Automate Website Screenshots using n8n & CaptureKit Website Capture API

Learn how to build a powerful automation workflow that captures screenshots of websites at scale using n8n, Google Sheets, and CaptureKit/'s Screenshot API.
N8N is one of the popular no-code automation tools, that can help you to automate your workflows.
In this tutorial, we are going to automate screenshot taking of websites using CaptureKit Website Capture API.
This will be a simple automation tutorial, you can integrate this to your already built workflows, or simply create it from the scratch using this tutorial.
At the end of this tutorial, I will also share with you the blueprint, which you can use directly in your n8n account.
Let's get started!
What Tools You Will Need
- n8n (Gives 14-day free trial)
- CaptureKit (Offers 100 Free Credits For First Time Sign up)
- Google Sheets (Where we list webpages & their screenshot URLs)
If you prefer following a video tutorial instead of reading through the steps, you can watch our detailed walkthrough below:
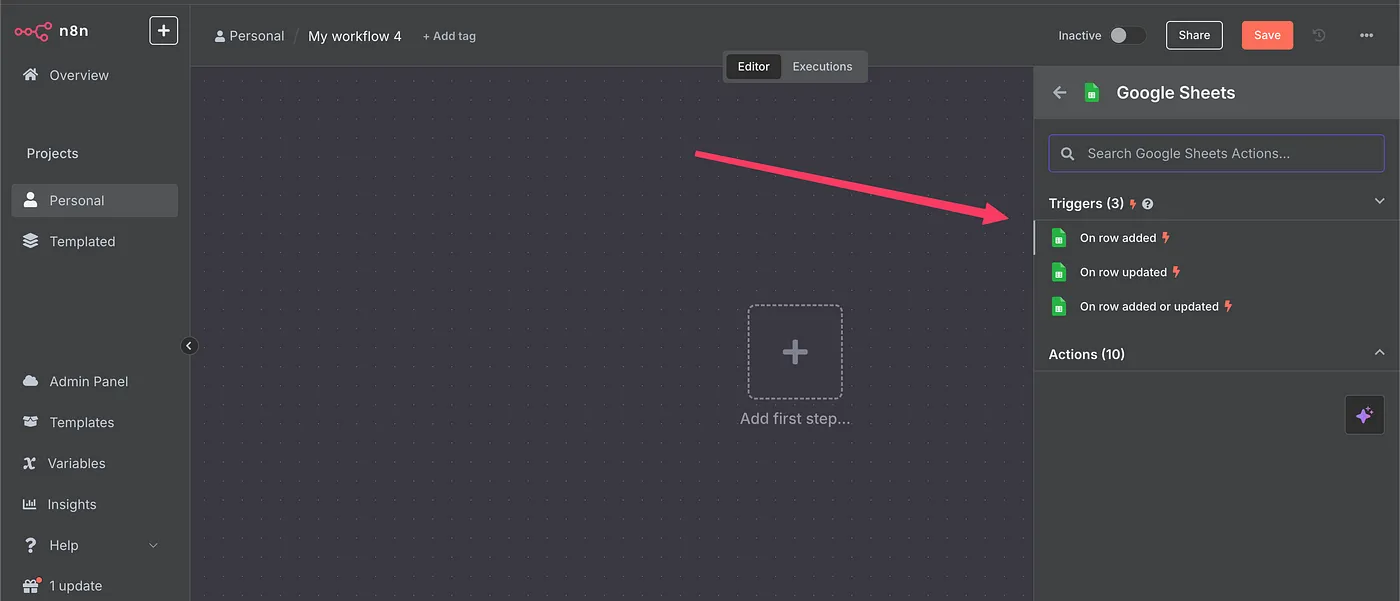
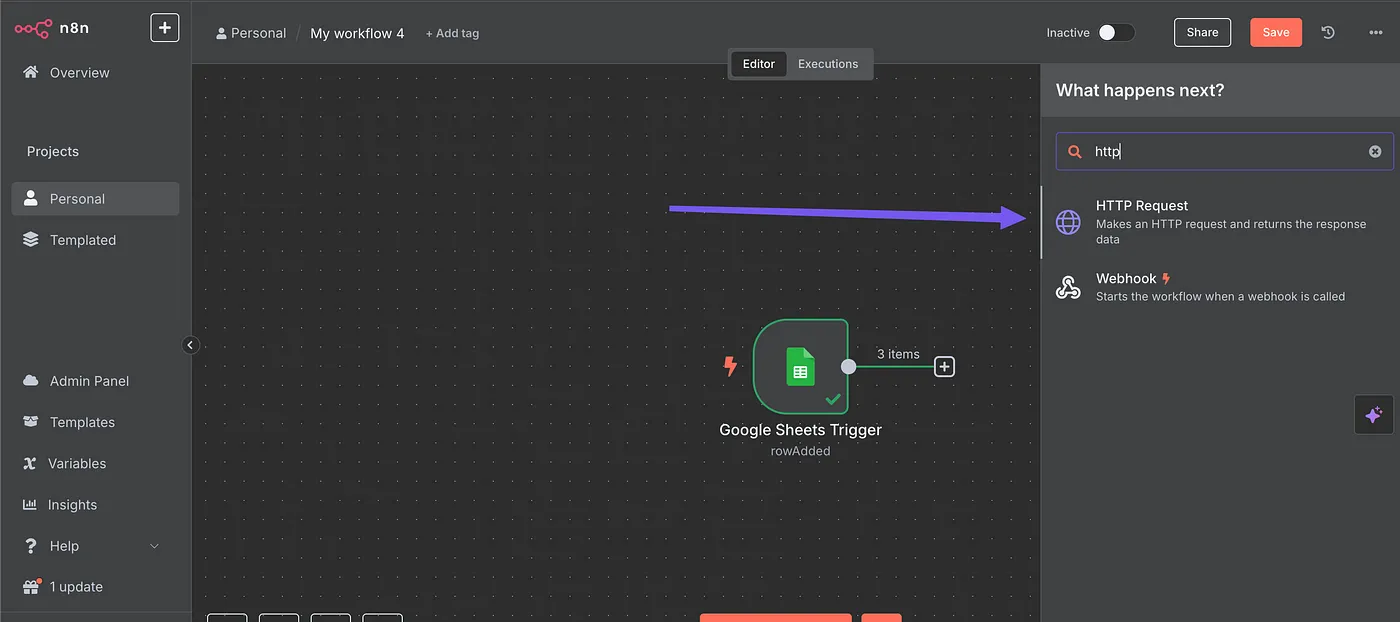
After signing up to your n8n account you let's add our first node. You would see a '+' sign, click that.
This will be the trigger our scenario, I am using Google Sheets → Add New Row ⬇️
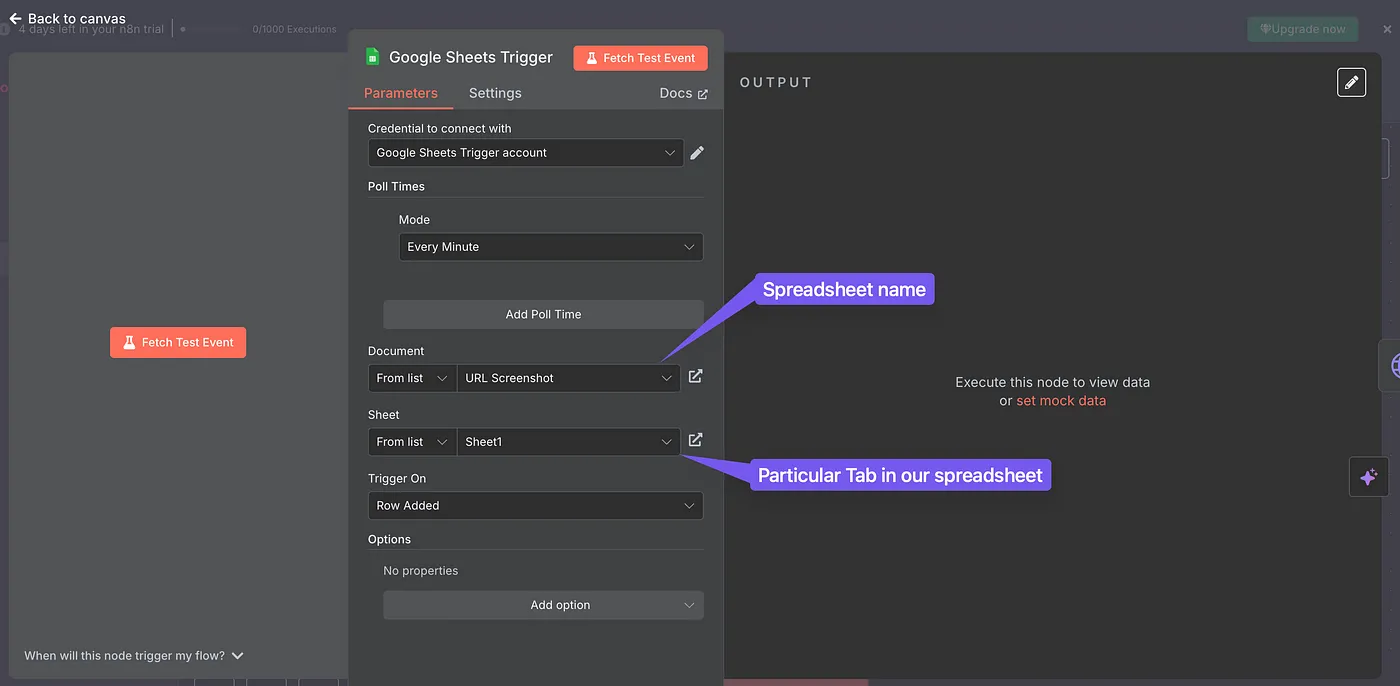
Once you are in this node, authenticate with your account (if you haven't already) & then map it with the Spreadsheet where you have the webpages/URLs stored.
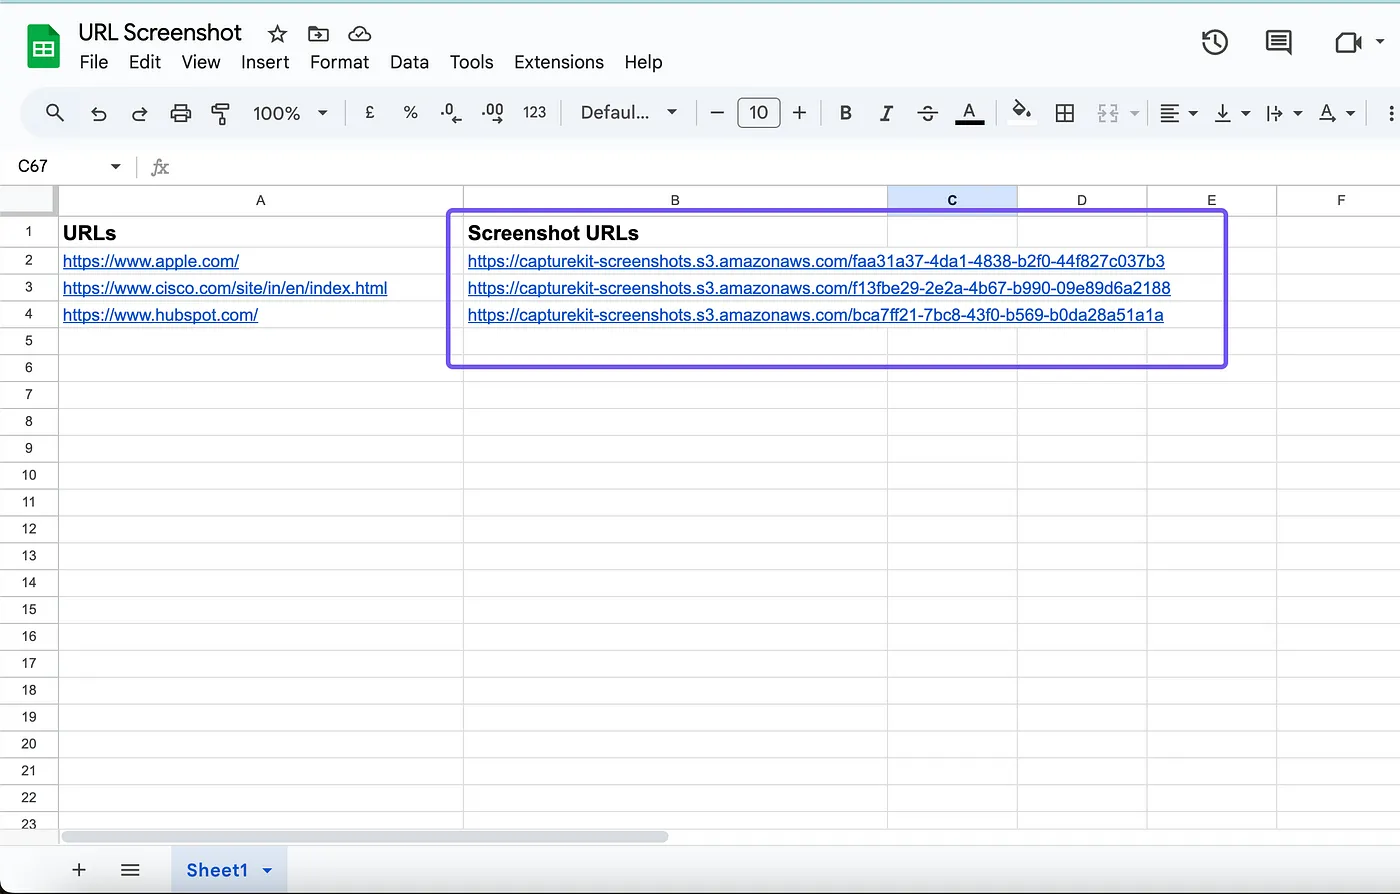
For this tutorial, I have the sheet ready with me, I am taking screenshots of these 3 URLs ⬇️
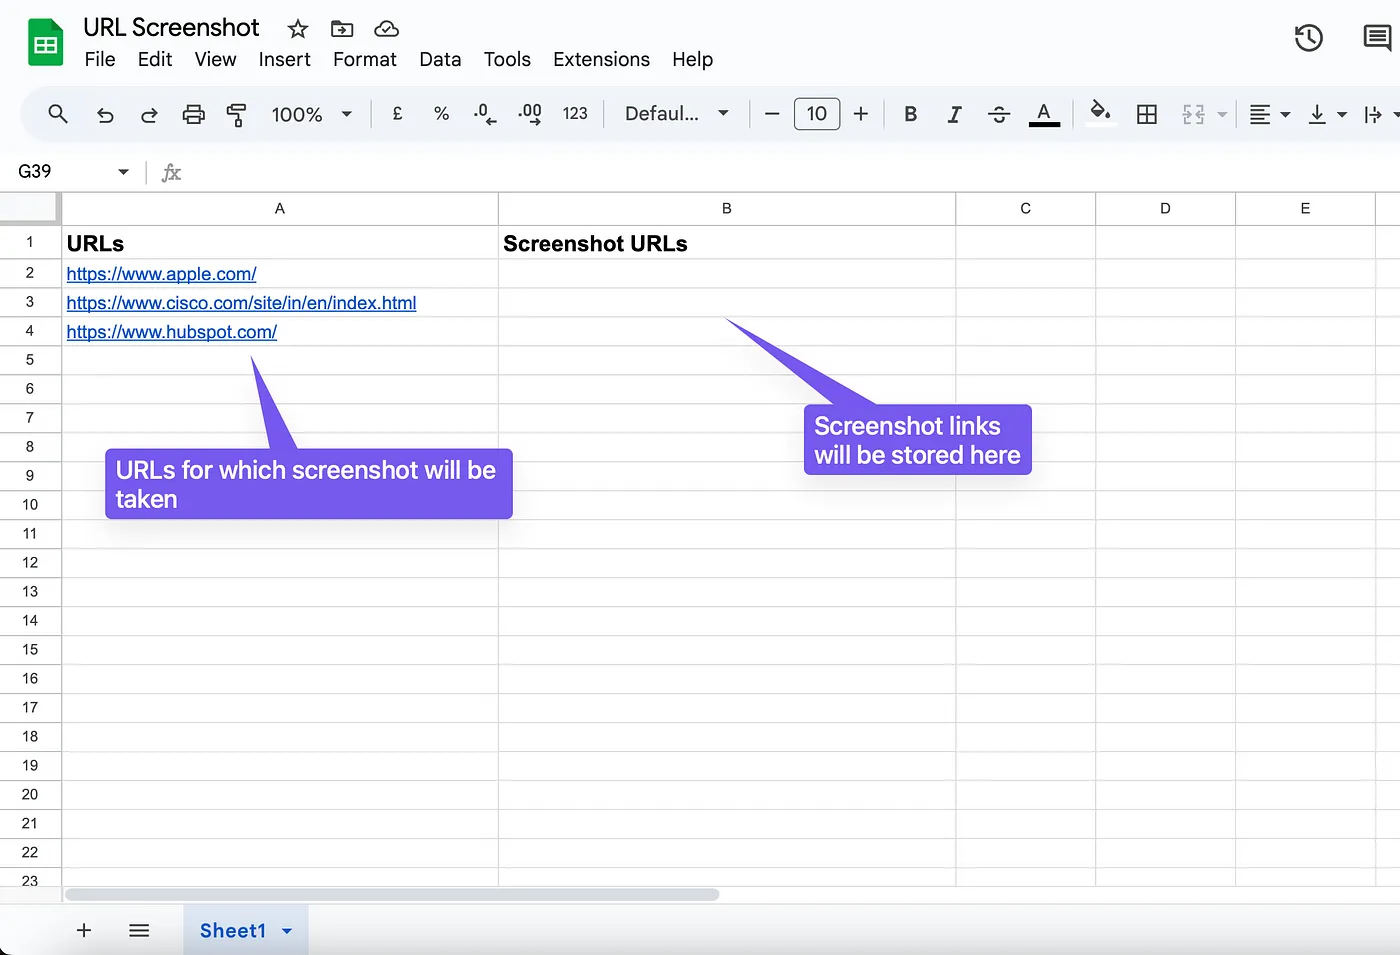
The Spreadhsheet name as you can see is "URL Screenshot" and the tab is default (Sheet1).
We intend to take the Screenshots in front of the webpages under the column Screenshot URLs.
Note: - The screenshot URLs are stored with our server, you can store them with any of your database too.
Let's map our first node to the right spreadsheet!
Testing this node ⬇️
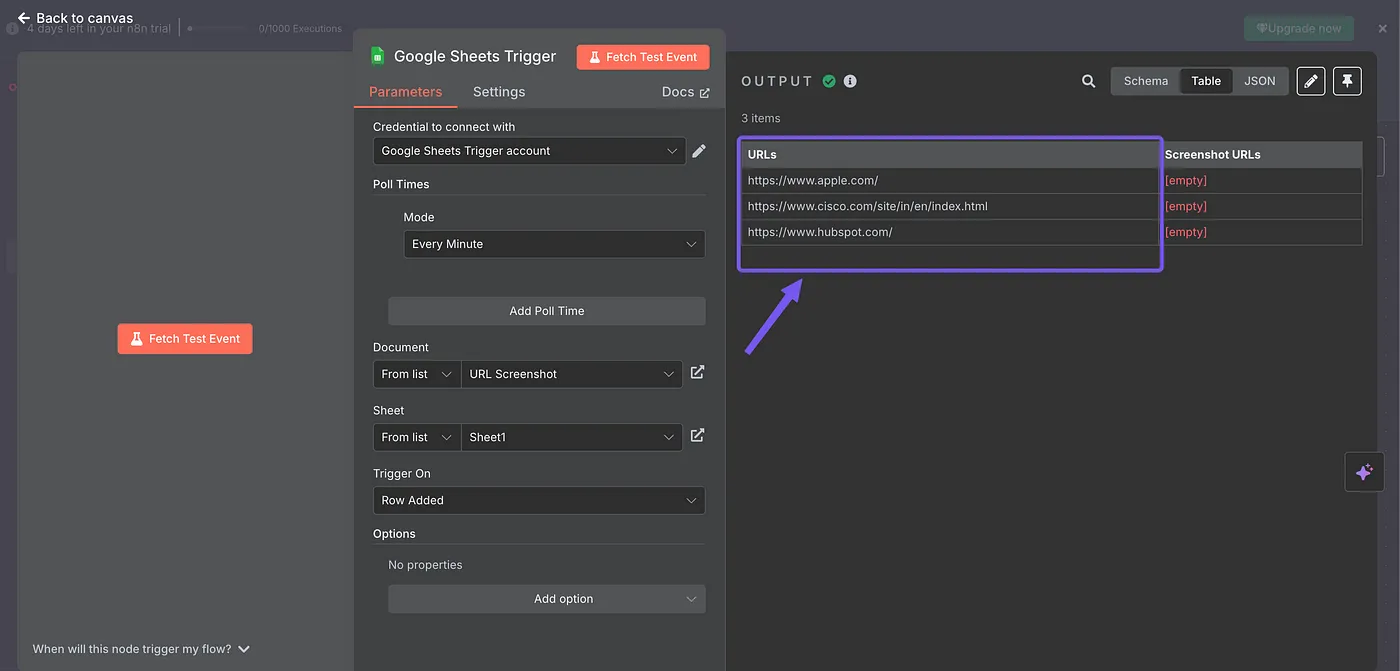
Working absolutely fine!
Time to connect it with CaptureKit's screenshot API.
The next node will be HTTP Request!
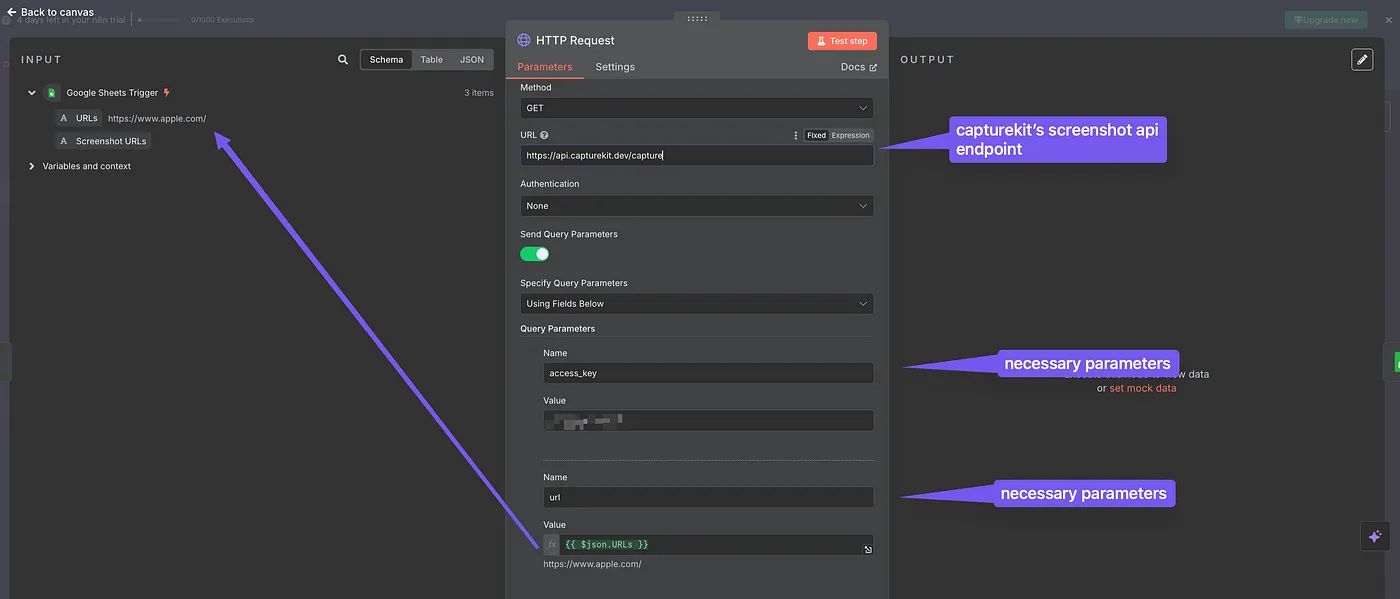
So we will send a GET request, to the capturekit's screenshot API.
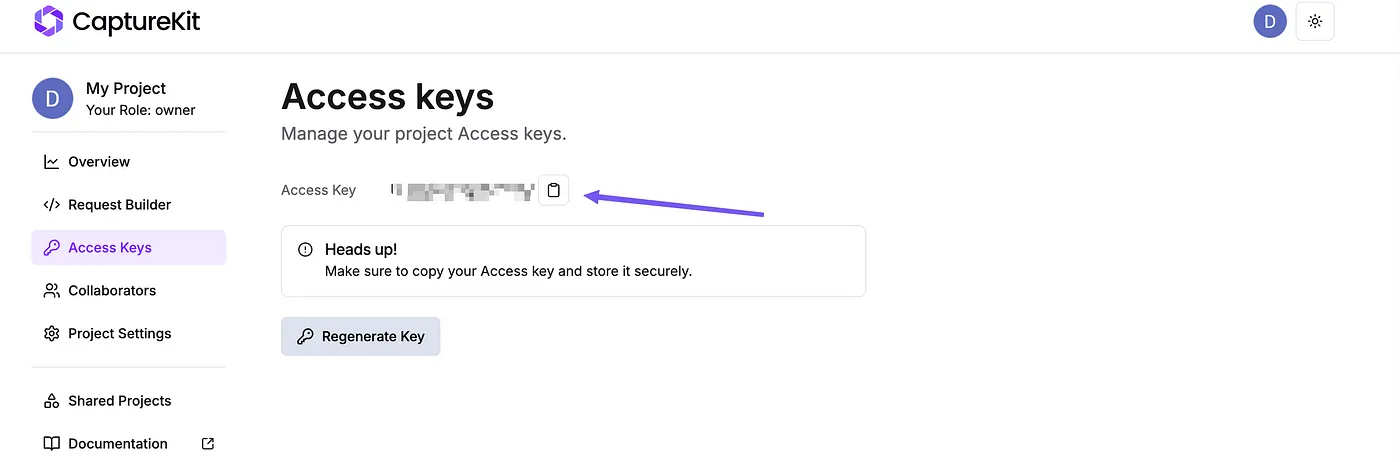
The endpoint is https://api.capturekit.dev/v1/capture, and the two necessary parameters that need to run this API are x_api_key & url (the webpage for which you want to take screenshot for). You can get your x_api_key in the CaptureKit's account-dashboard!
Prior to using this API, I would recommend you to go through the documentation to better understand how this API works & functions of different parameters.
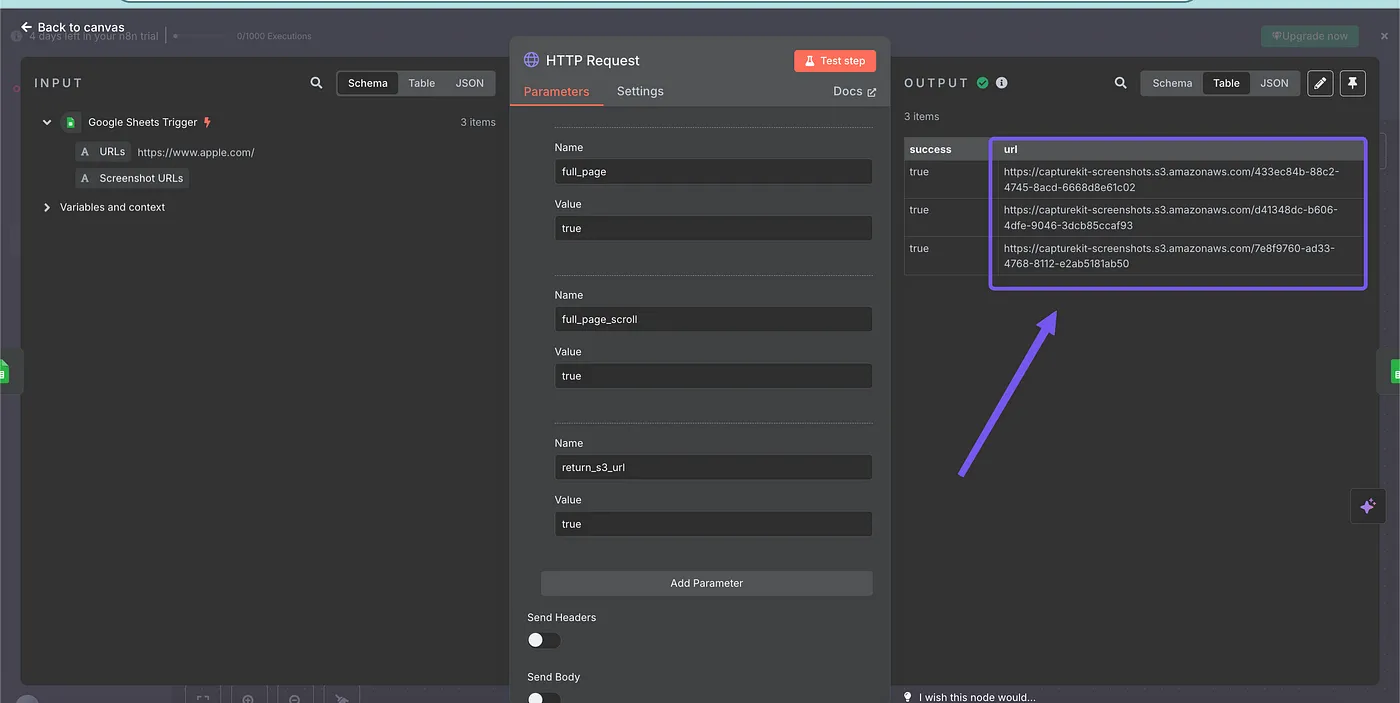
Perfect!!
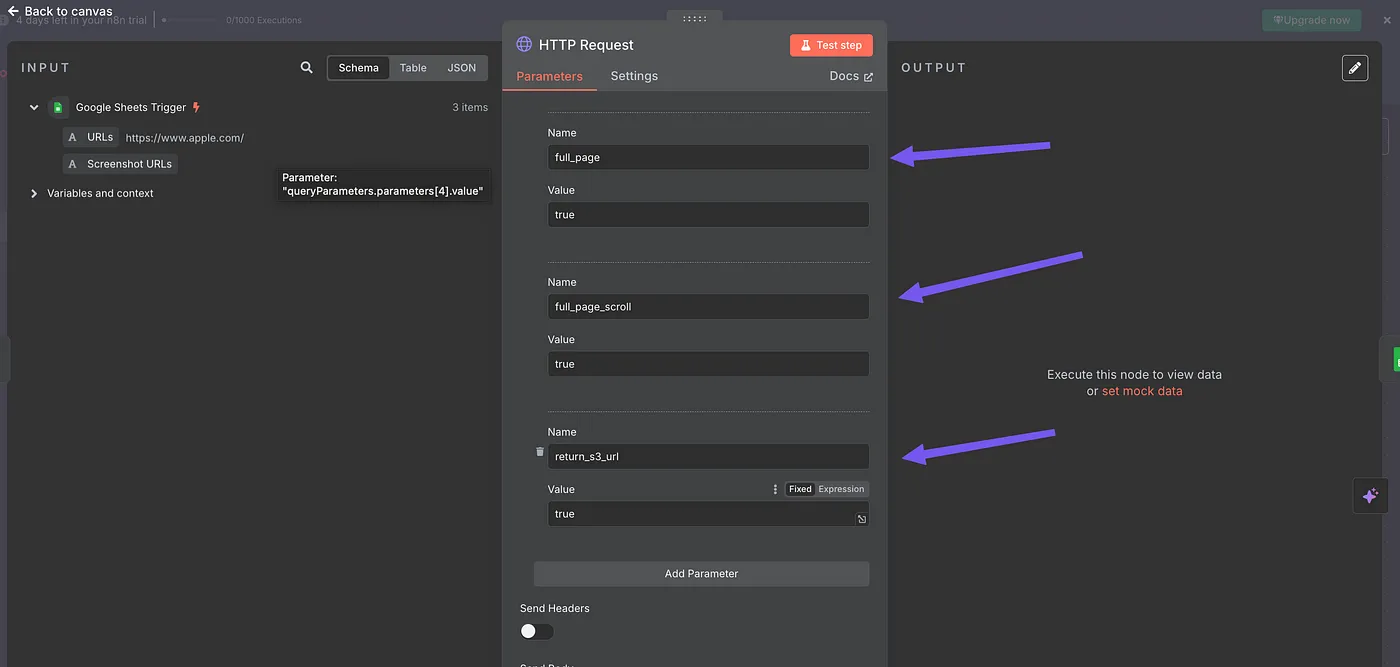
I have applied some more parameters in this node i.e. full_page, full_page_scroll & render_s3_url, all these parameters are self explanatory, the render_s3_url parameter gives the URL of screenshot in the output.
Let's test this workflow up until now.
Awesome, if you have made it to here, you are almost done.
Finally, we will take the screenshot URLs back to our Google Sheet.
Let's add the final node to our workflow.
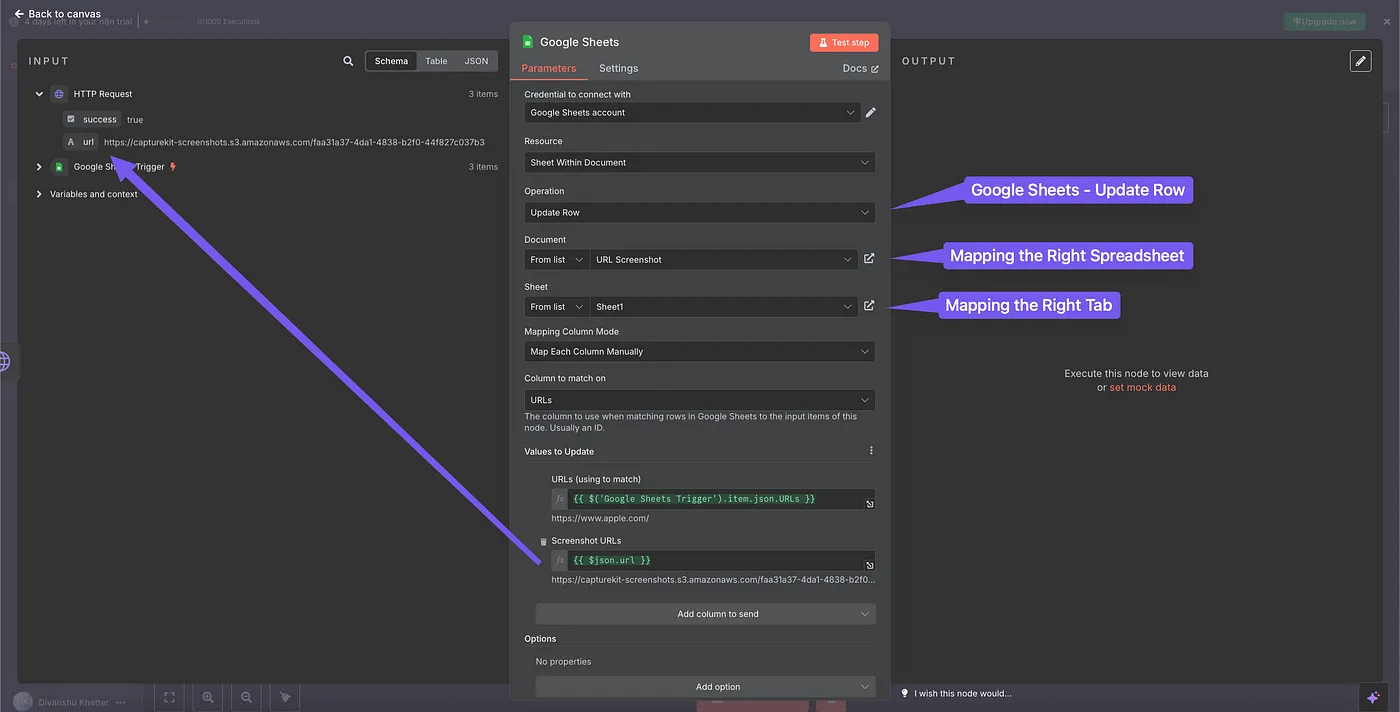
Testing this ⬇️
Gives the screenshot URLs

And our spreadsheet is updated too.
Let's open the first screenshot!
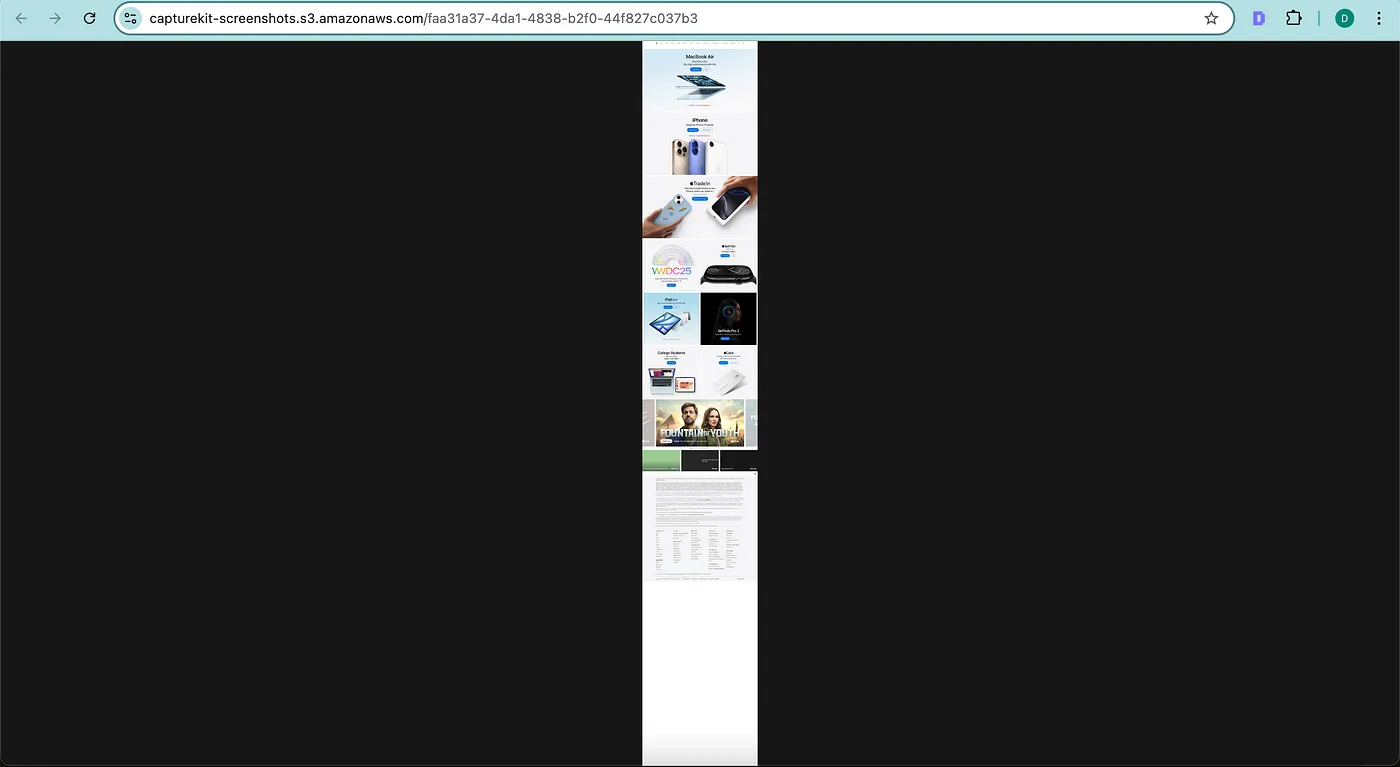
Our scenario is capturing the full page screenshot!
And here is the blueprint for this automation!
Conclusion
If you are someone new to automation, and need help setting it up, ping me up on CaptureKit's Website Chat!
Also, if n8n isn't your thing, I have built basic automation on Make with Screenshot API & has a tutorial on Zapier too!
Happy Automating!
Ready to get started with CaptureKit?
Start capturing screenshots and extracting content today. Get started for free.
Get StartedYou Might Also Like
7 Ways to Automate Chrome Screenshots
Discover 7 powerful ways to automate Chrome screenshots using APIs, extensions, and code tools. Capture webpages easily for testing, reports, or content creation.
4 Best Screenshot APIs To Scale Up Your Website Capturing Process in 2026
In this post, I have taken the best APIs for website capturing that you can use in 2026. All of these are tested and proved to be among the best of all the APIs out there.
4 Best Email Finders in 2026
Discover the top 4 email finder tools that help you find and verify professional email addresses, with detailed comparisons of features, pricing, and accuracy rates.