Build A Free Lead Magnet For Your Marketing Agency Using Screenshot API

Learn how to create an automated lead magnet that captures website screenshots and provides AI-powered analysis to potential clients
Lead magnets can help you get potential leads for your marketing agency. The idea for the free tool we will be building here is to ask for homepage URL (& email via a form), take the full page screenshot and ask AI what improvements can be done on the page.
This system can be integrated with other big systems wherein you also take behavioral data for more analysis.
I will also give you a blueprint of this automation in the end, so that you can import and use it as is for your projects.
Look at this Reddit post, where I got the Idea to build this use case for:
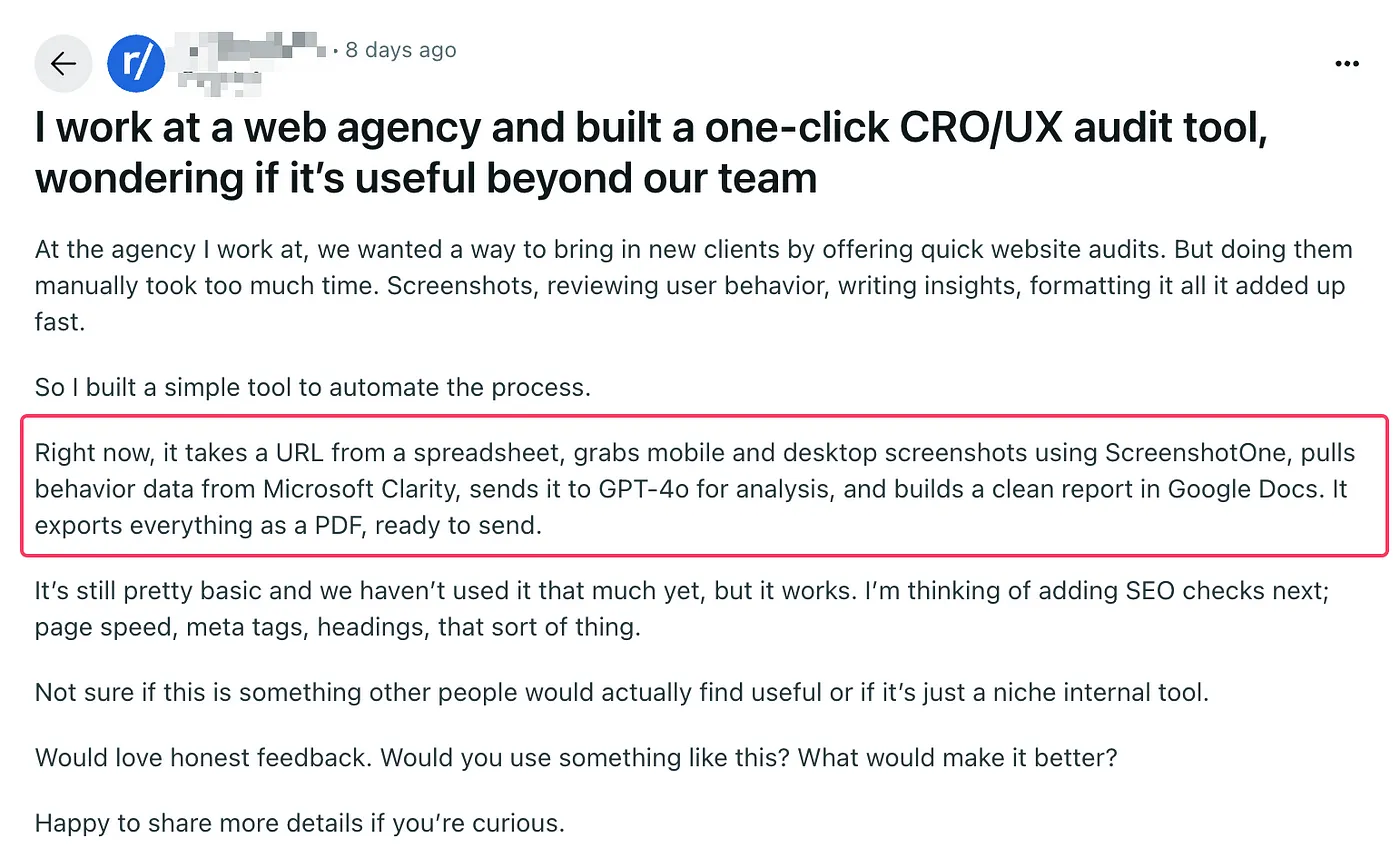
Yes, they are using one of the other Screenshot API then the one being used by me i.e. CaptureKit Screenshot API.
But the process will be similar altogether.
What We Will Be Using To Build This System
- Make.com
- CaptureKit's Webpage Capture API
- Google Sheet
In place of Make, you can use any other no-code/low code automation tool. I am more comfortable with Make & therefore using this particular platform.
Make offers 1000 free credits, so you can build this system at no-cost.
Sign up to CaptureKit from here, it offers 100 free credits.
Let's build this system!
You can watch this quick video walkthrough of the system too ⬇️
This automation starts by collecting basic details, and we have used a Tally form at the very start.
You can use any other form (like Google Forms) too. Let's suppose you have this form on one of your webpage, wherein you take the email address and homepage URL from your potential clients.

Note: - We will send the final report to the email we take here, and will take the screenshot of the whole homepage URL given here to analyze.
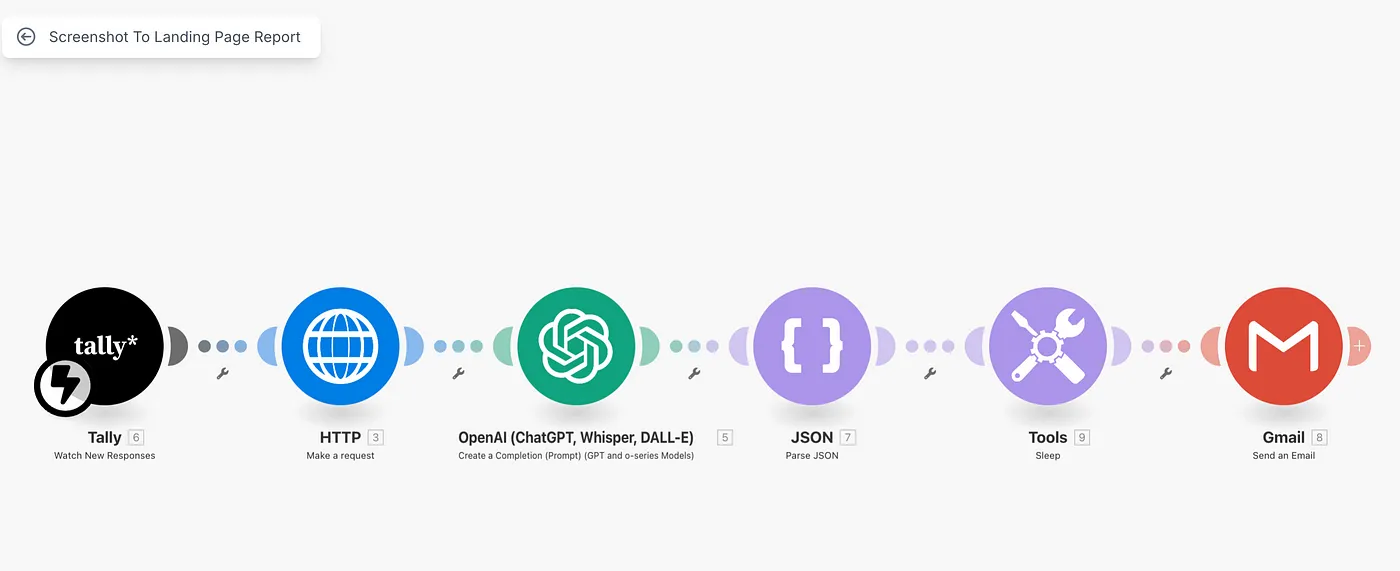
In Make, tally will be our first module, we will watch for any new responses that come in here and pass onto our next module.
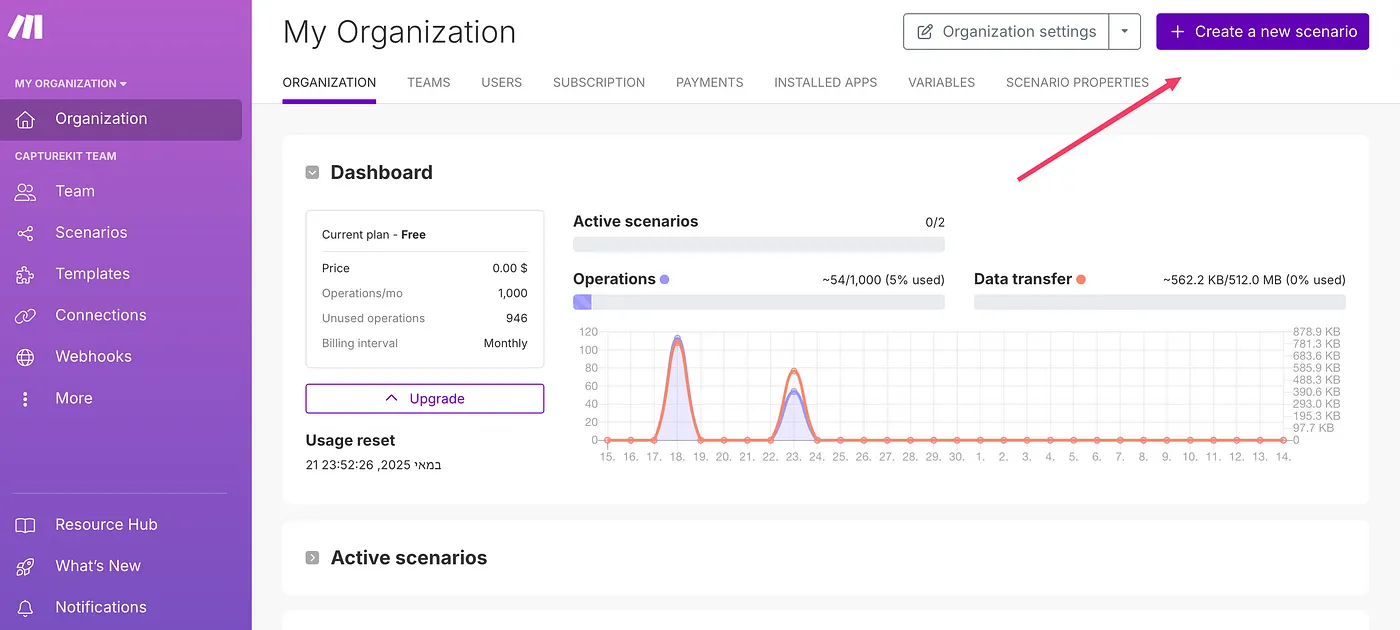
Create a new scenario in Make
Add "Tally" ➡️ watch new responses as first module.
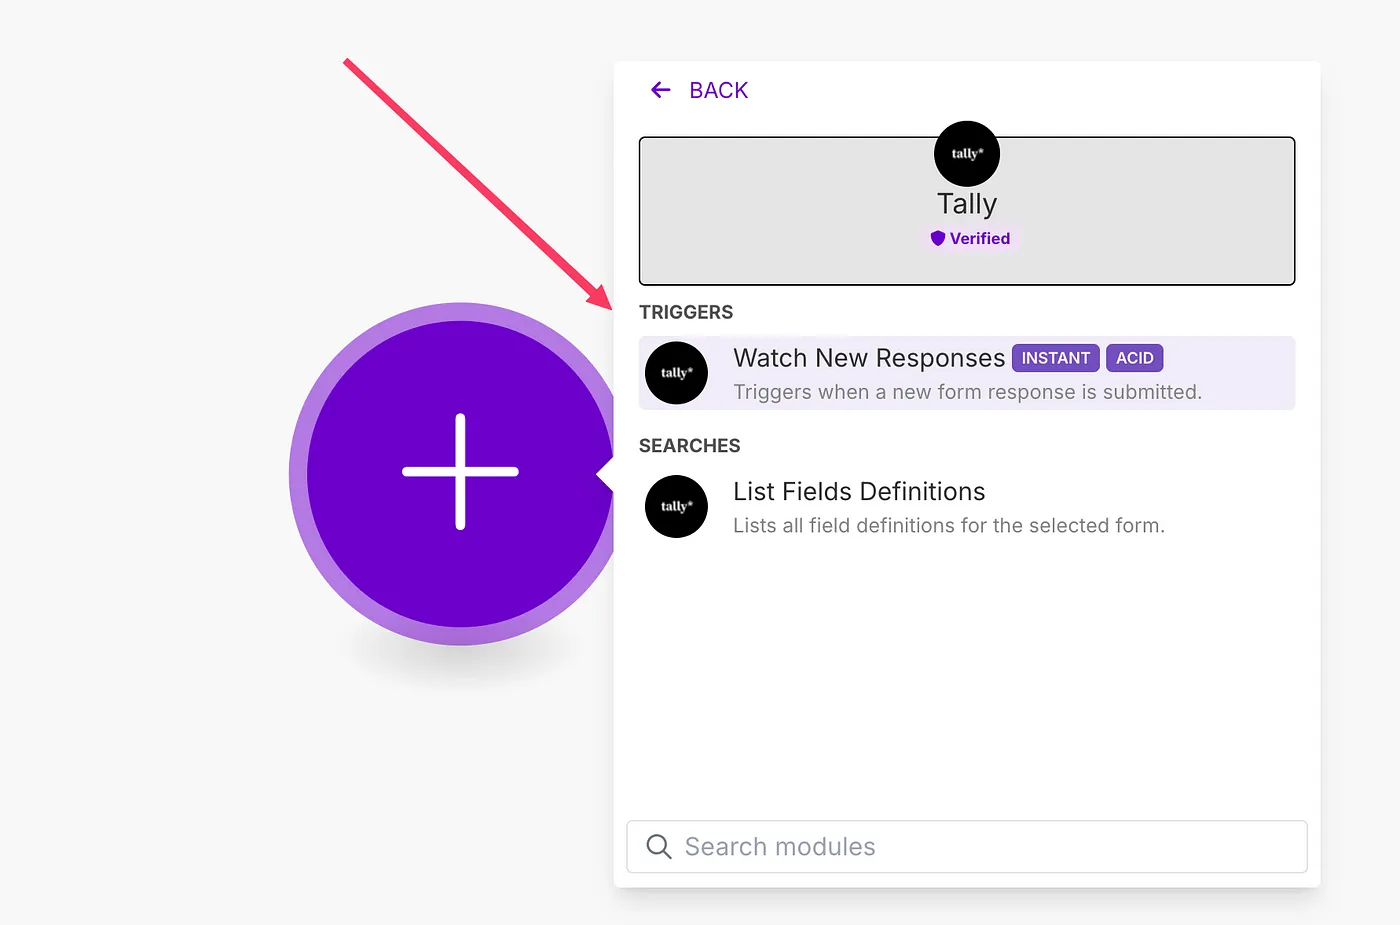
Connect the form with your account and map it to right form ID.
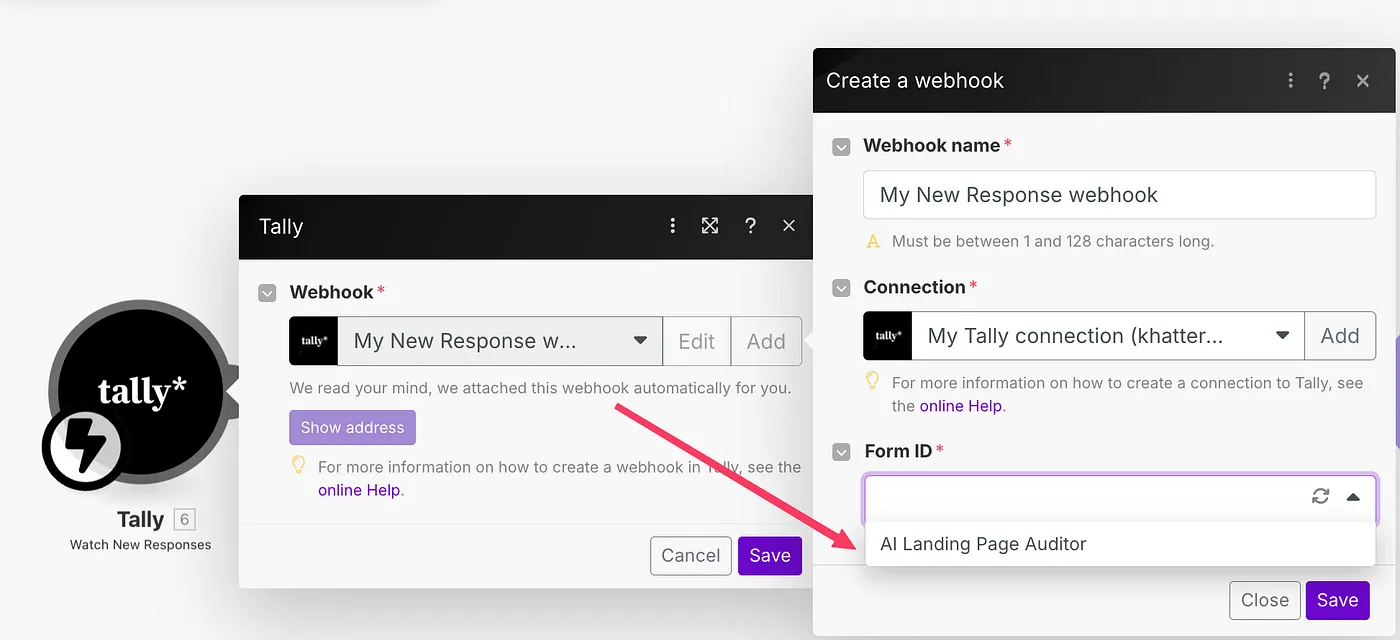
Each form has a unique Form ID you could name it.
Next, we will use an "HTTP" module and here we will use our Screenshot API & map the URL to which we want full page capture for.
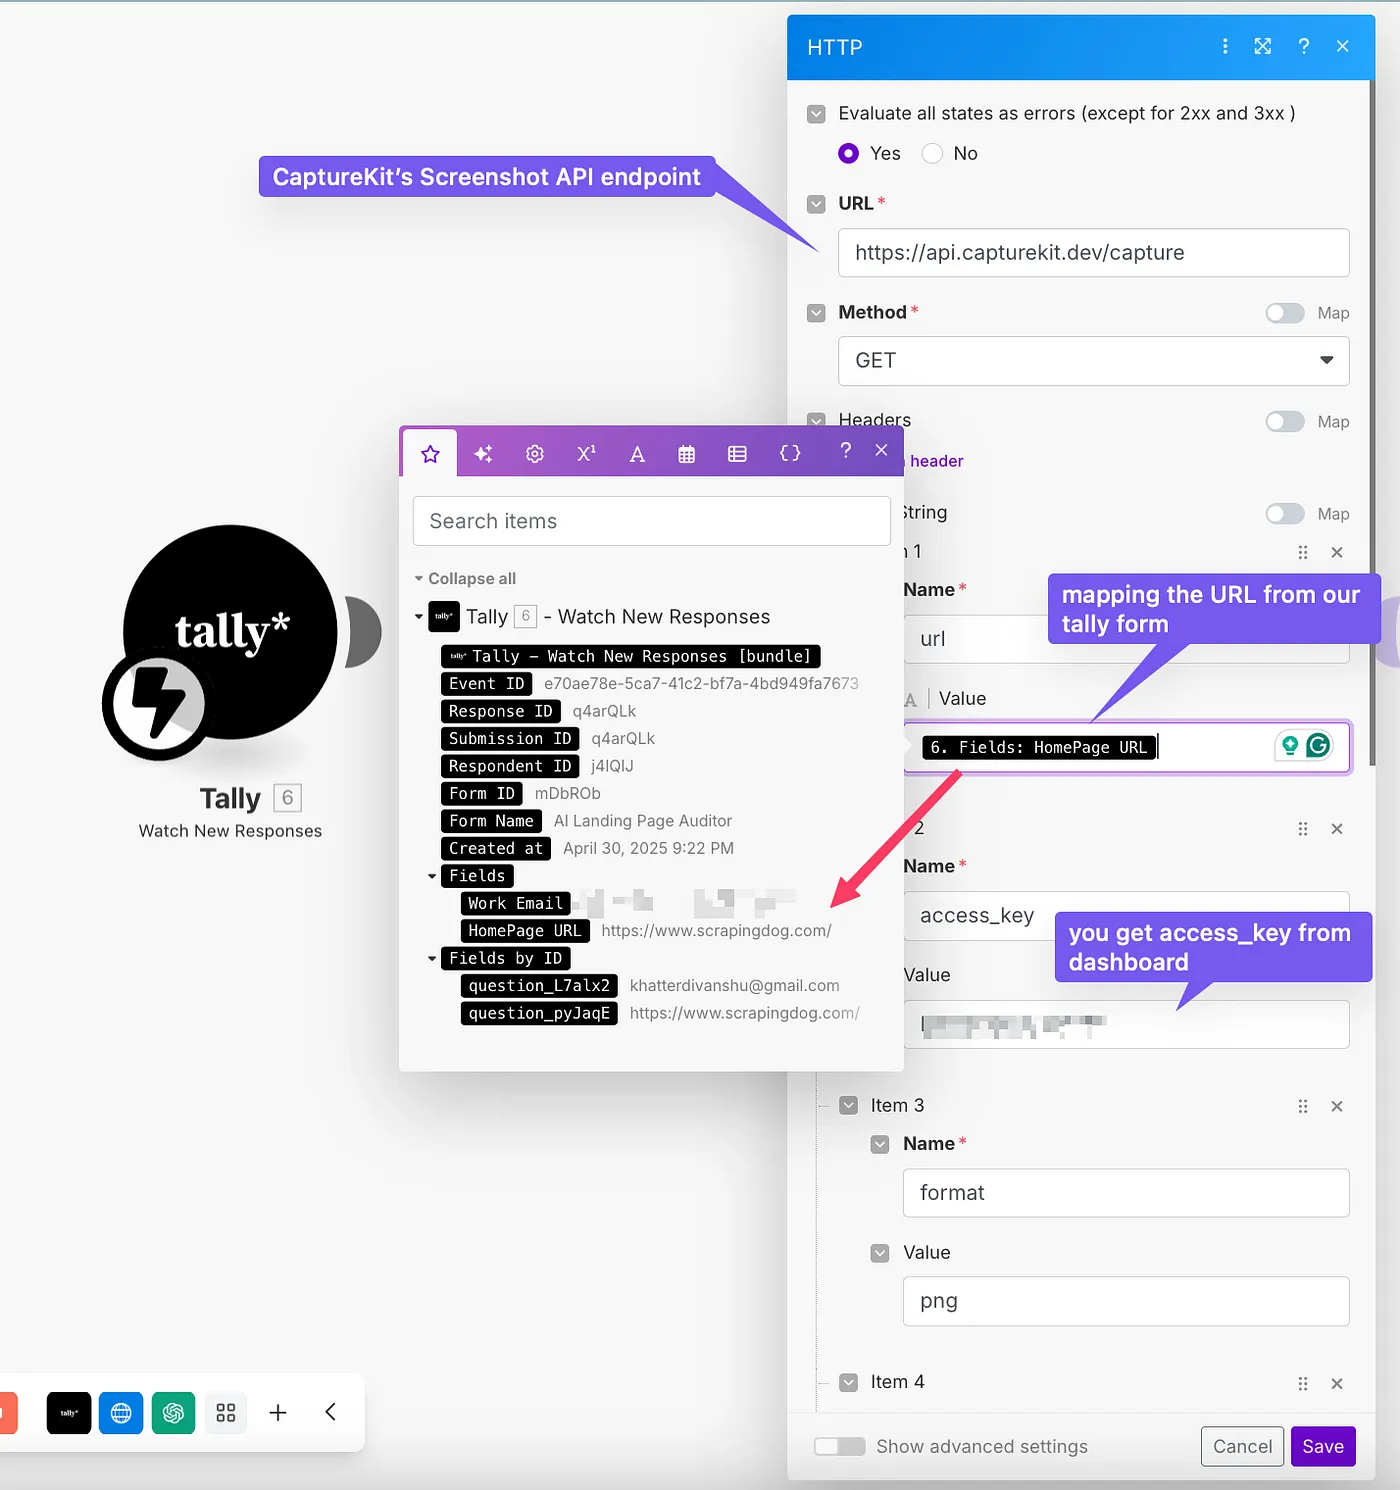
We are using the CaptureKit's Screenshot endpoint in the URL (first field), you can read more on how to use this API & what parameters this API has in the documentation here.
There are two necessary parameters, url & access_token, as you can see from the above image, we are mapped the url to the link we receive in Tally form.
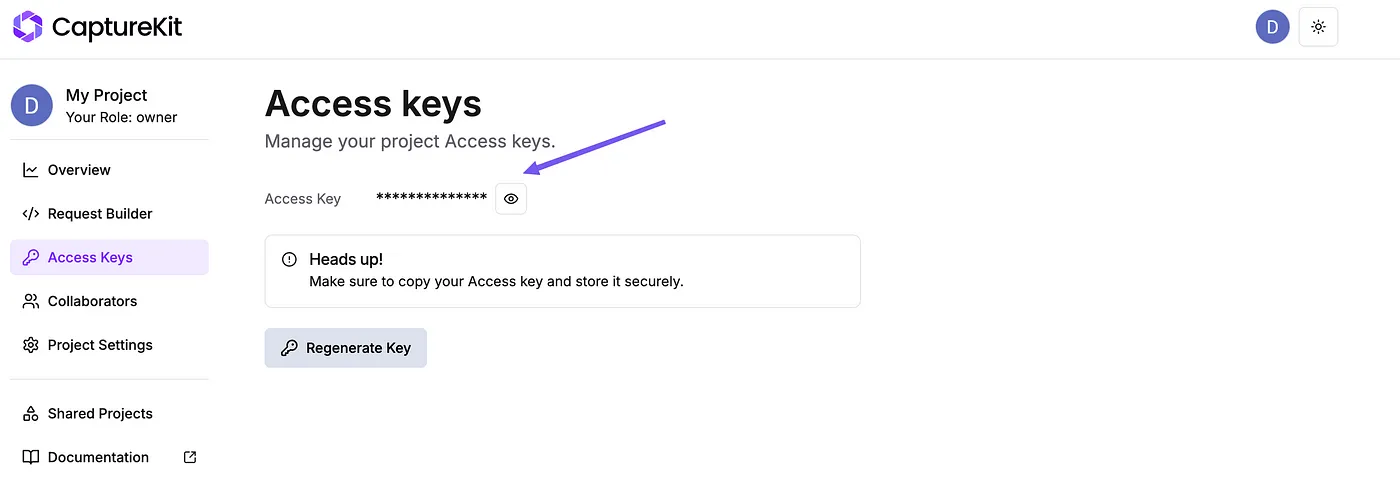
You get your screenshot API's access_token form the CaptureKit's dashboard, once you sign up.
Essentially we also have to use the full_page parameter to get the full page, it is also in there the HTTP module.
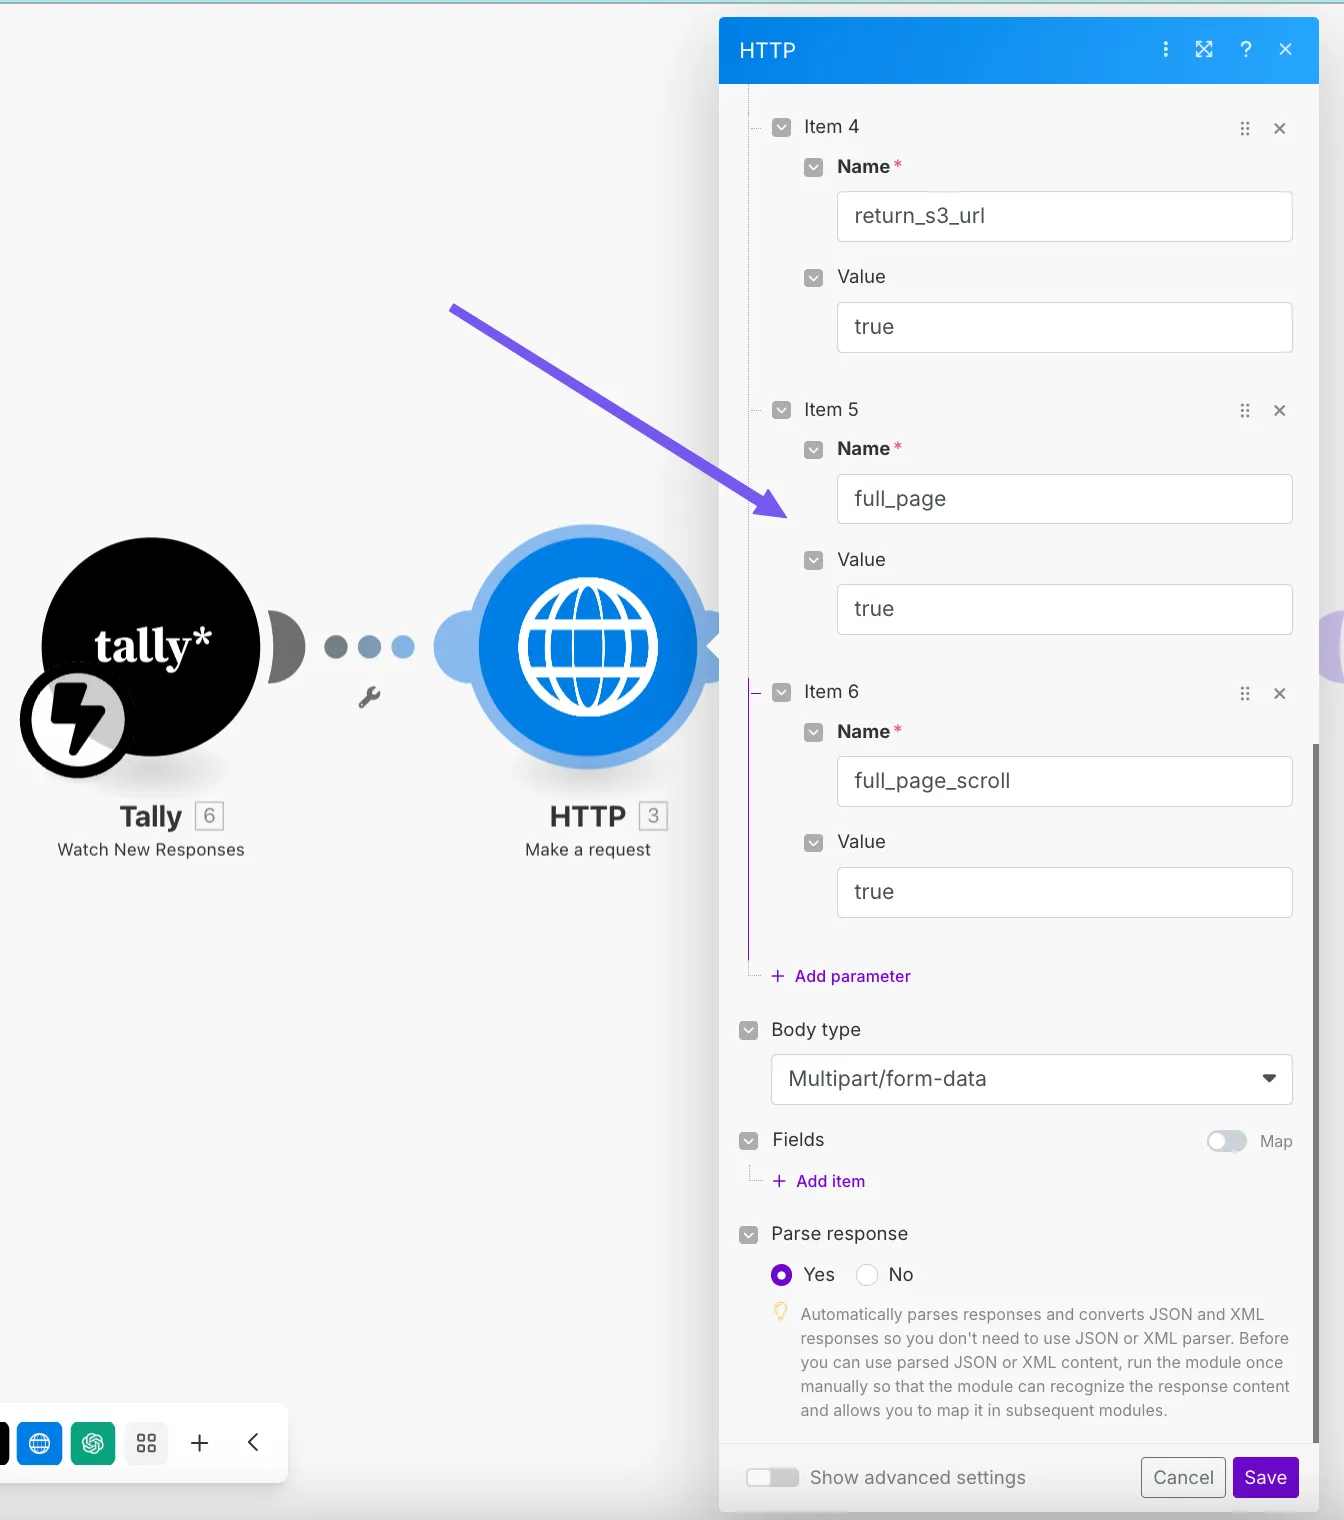
Note: We have used more parameters in the HTTP module, but just to make sure the article is easily understandable, we have kept the content short. But you can always see the all the parameters in the blueprint for this tutorial.
Next we are using an AI module (OpenAI specifically) and giving it the screenshot we have captured to analyze.
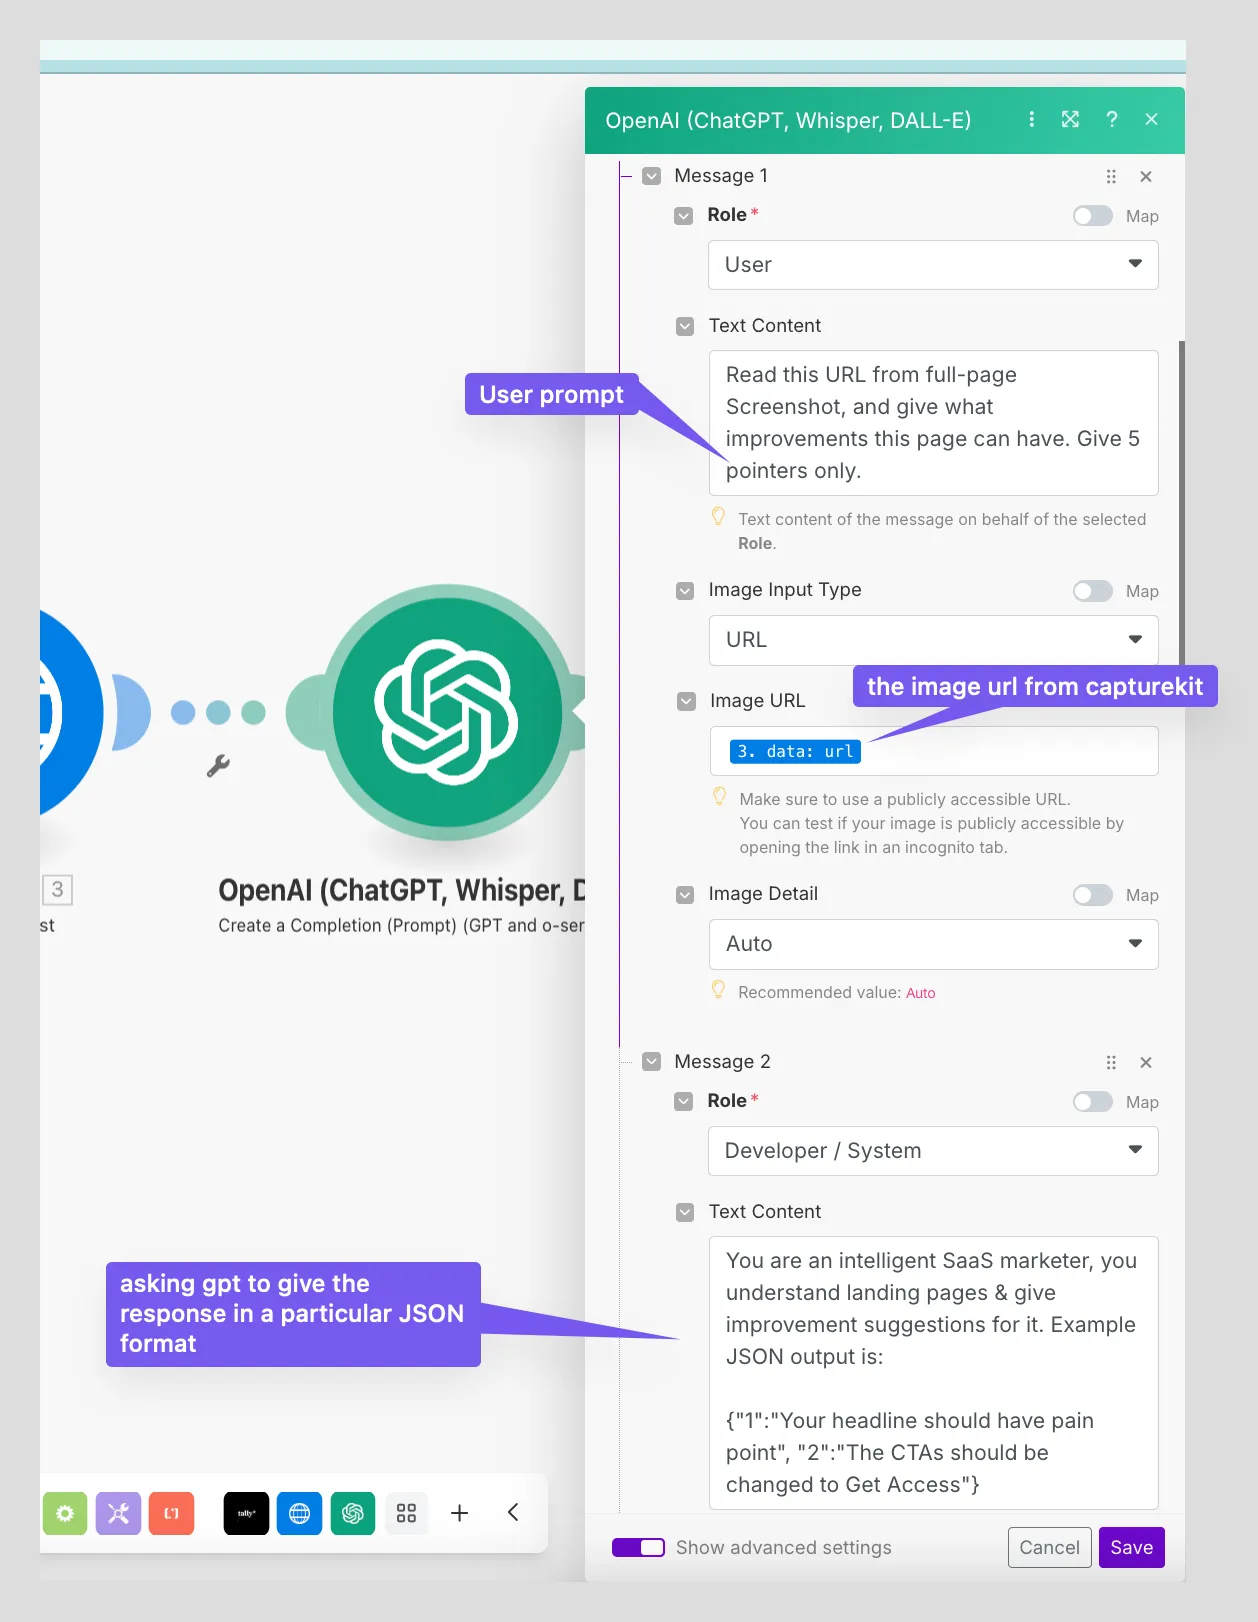
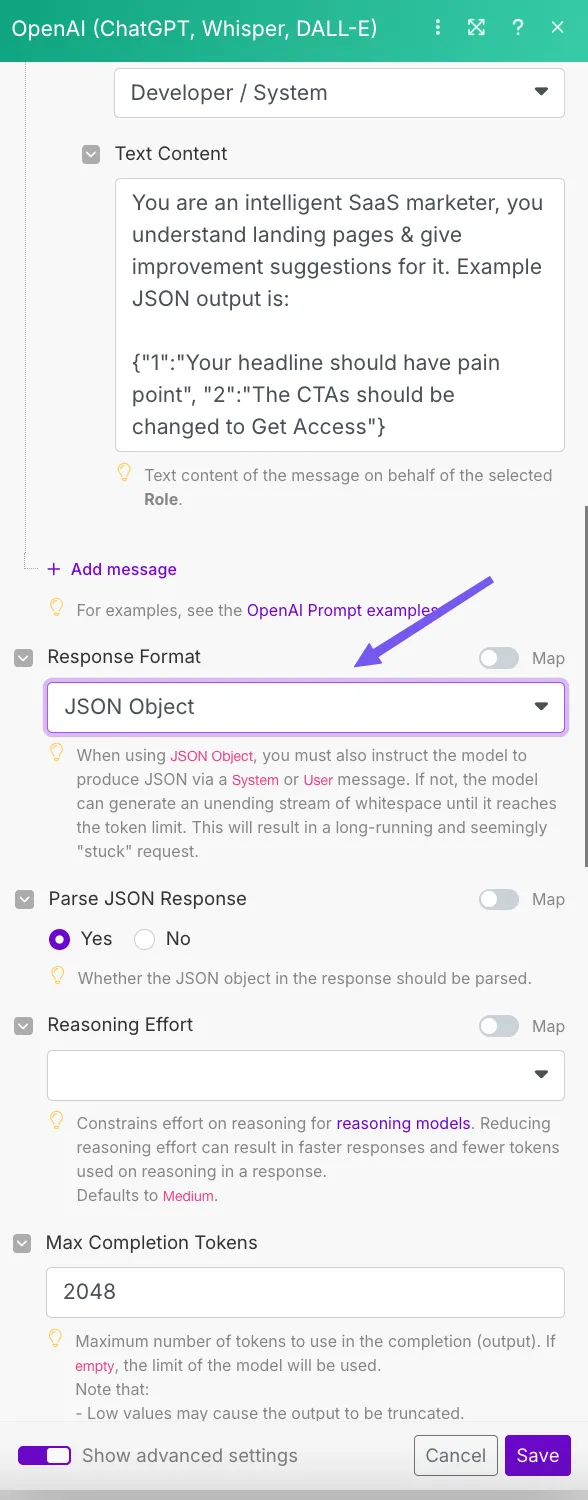
Also, we have restricted this AI module to give us JSON response only, you get this option in the advanced setting of this module. ⬇️
The prompts in here are given to only 5 pointers every time in JSON.
We will now parse the output received from this module, and therefore a "Parse JSON" module will help.
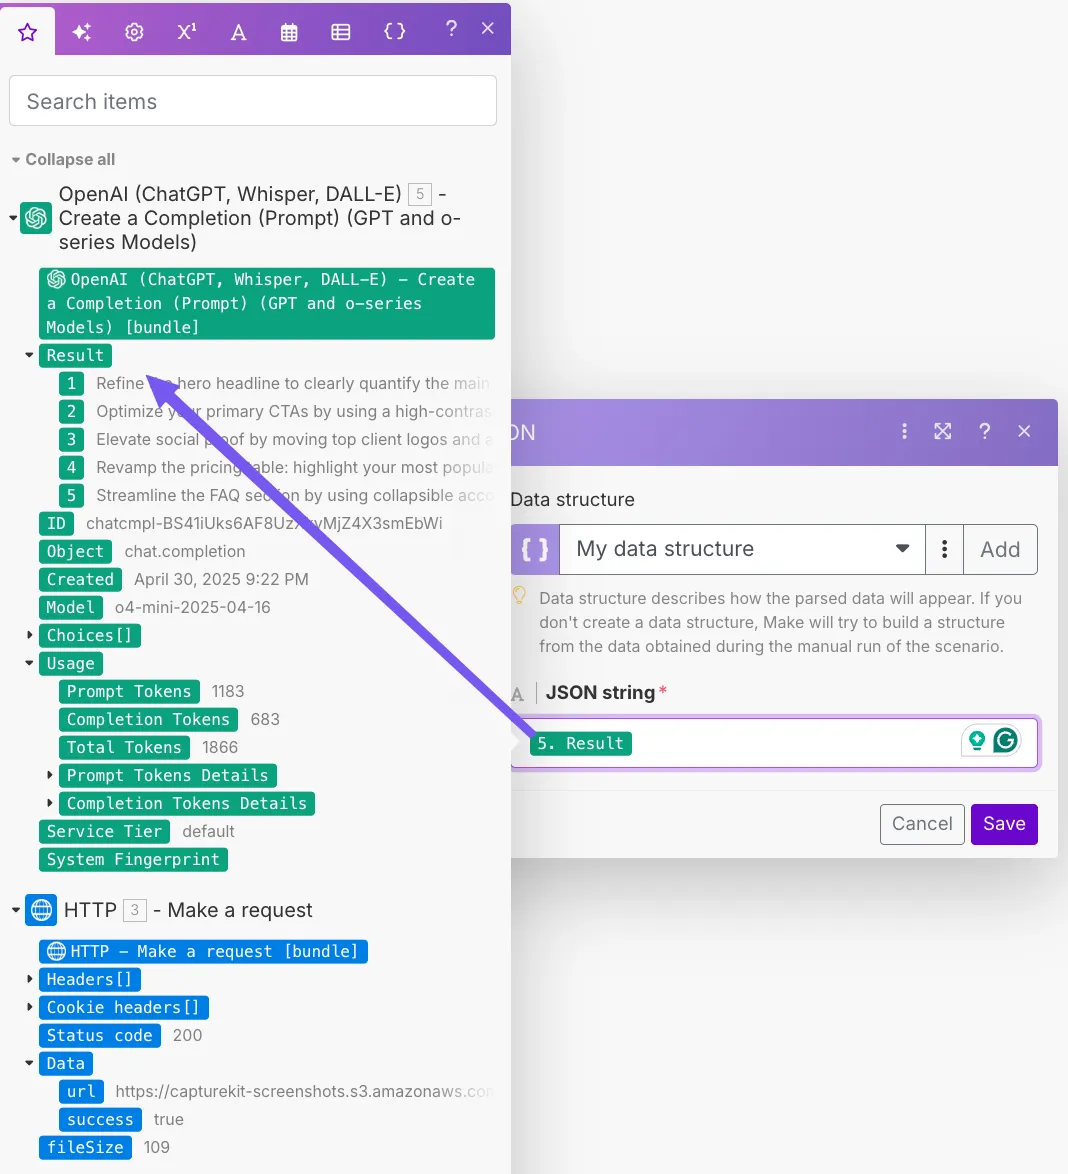
We will map the output in the JSON string, as you can see, and for the data structure, you can give an example, of the sample data we gave in previous module.
See the below GIF as to how you can create the data structure in "Parse JSON" module ⬇️
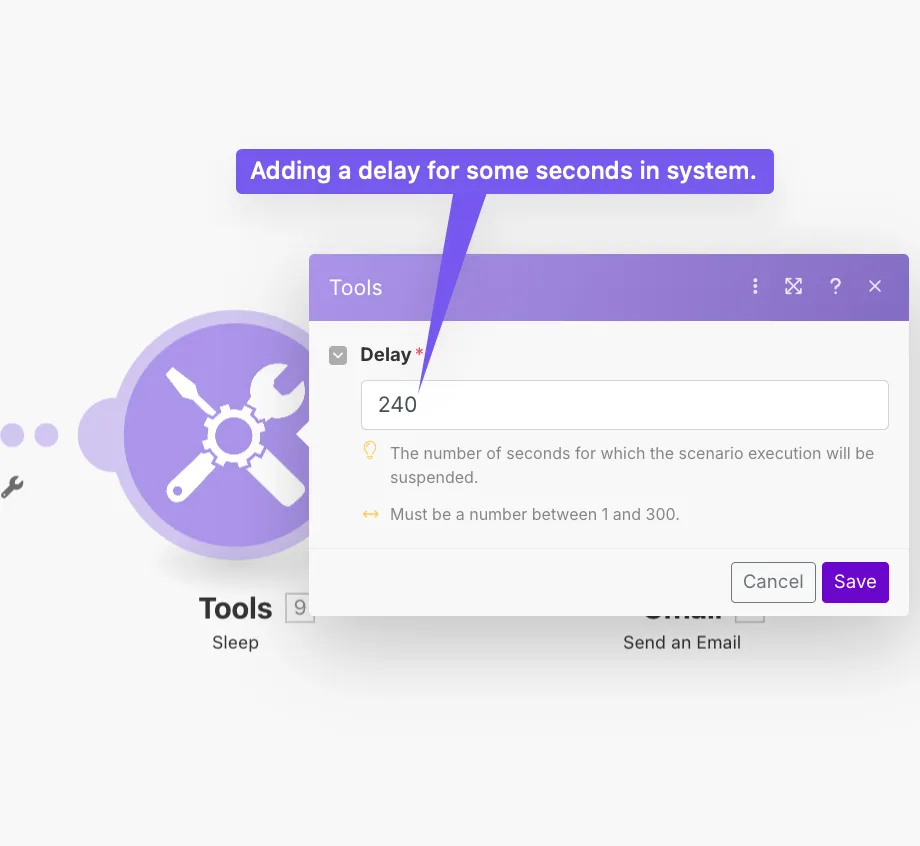
The next module is sort of something that is not necessary. But it is there so that the potential client to whom we will be sending report to shouldn't think that the report is created with AI.
How?
Think of you as a user, if you get an email of recommendation as soon as you fill the email would create some suspicion, right?
And therefore this module (Sleep) pauses the workflow for few seconds.
And now the final module, which is the Email Module. Here we will send the email to the user on the 5 pointers.
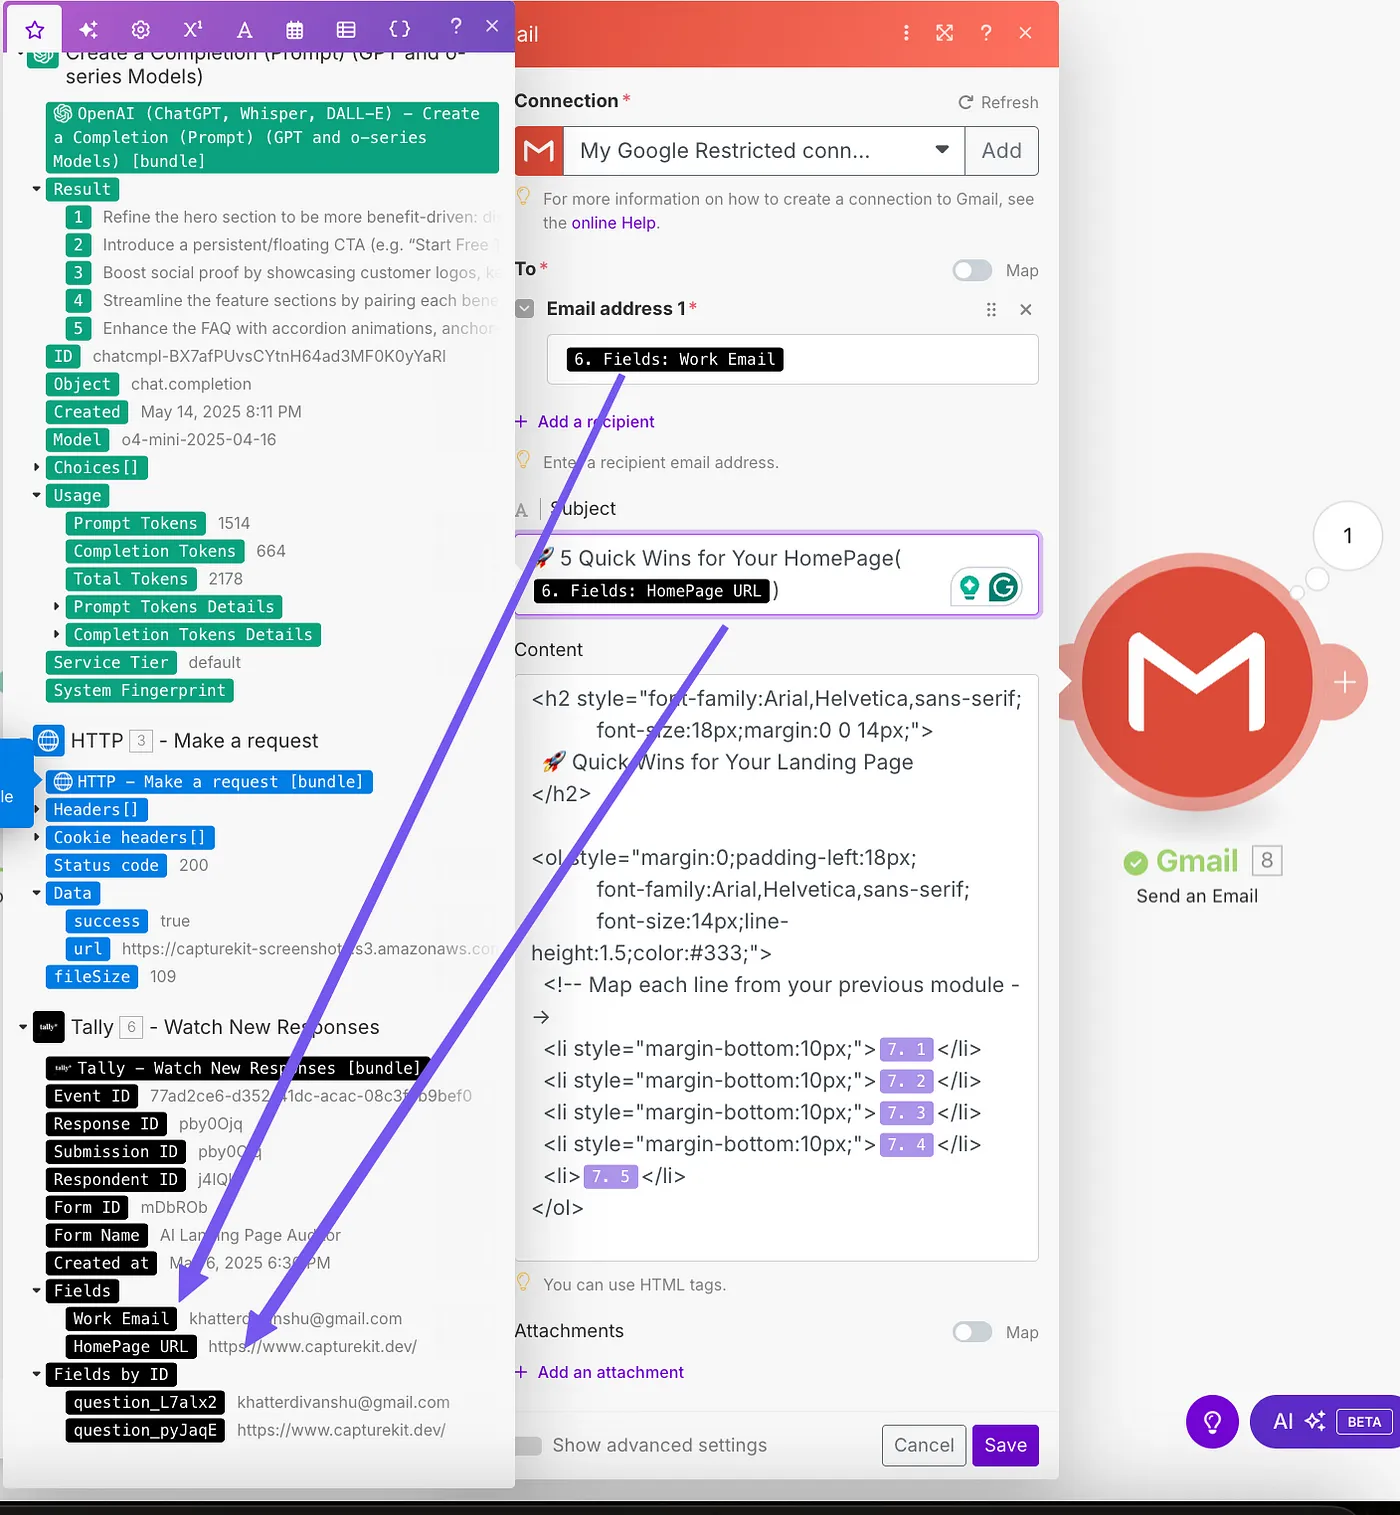
In the image above, once I have connected to my account, I will map it to the right email address.
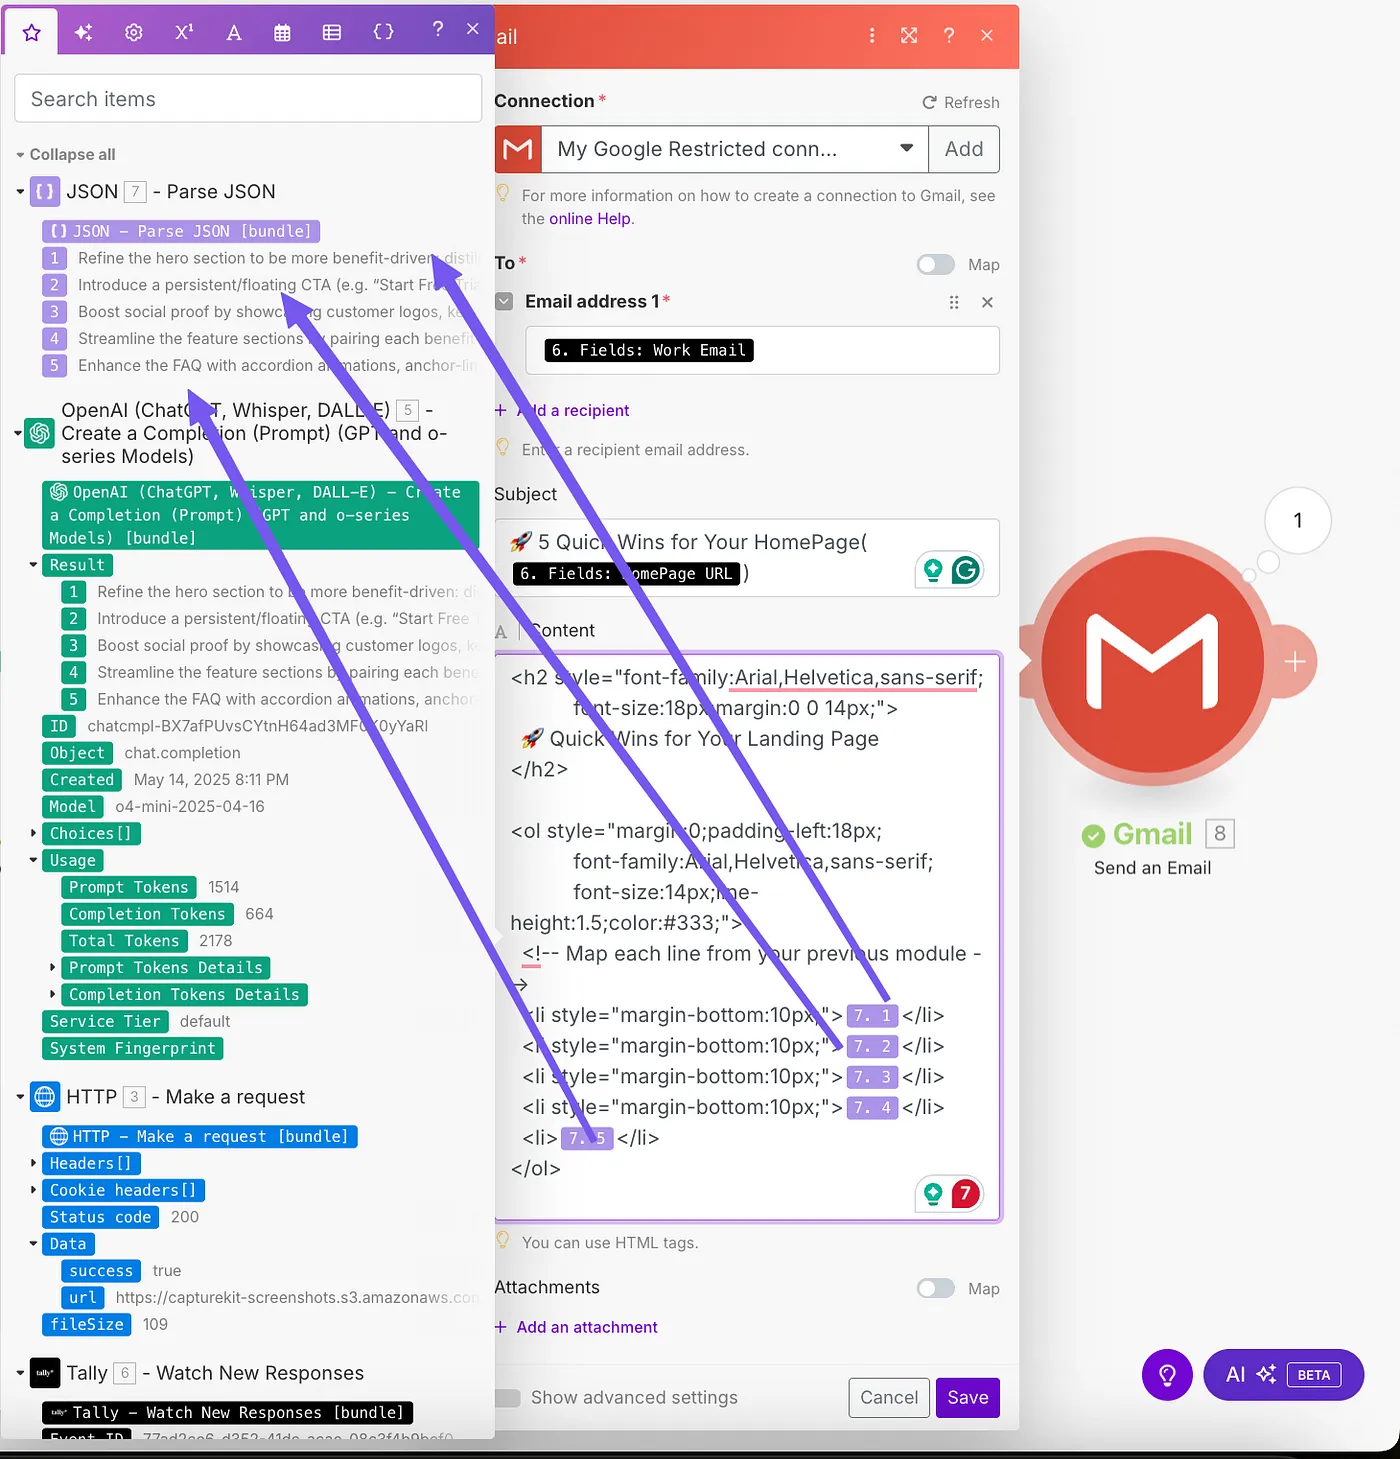
Next I am mapping the pointers that are in parsed format in an HTML.
Note: - The Email/Gmail Module in Make, allows you to format data via HTML. You can change the HTML in the content field of this module for specific formatting.
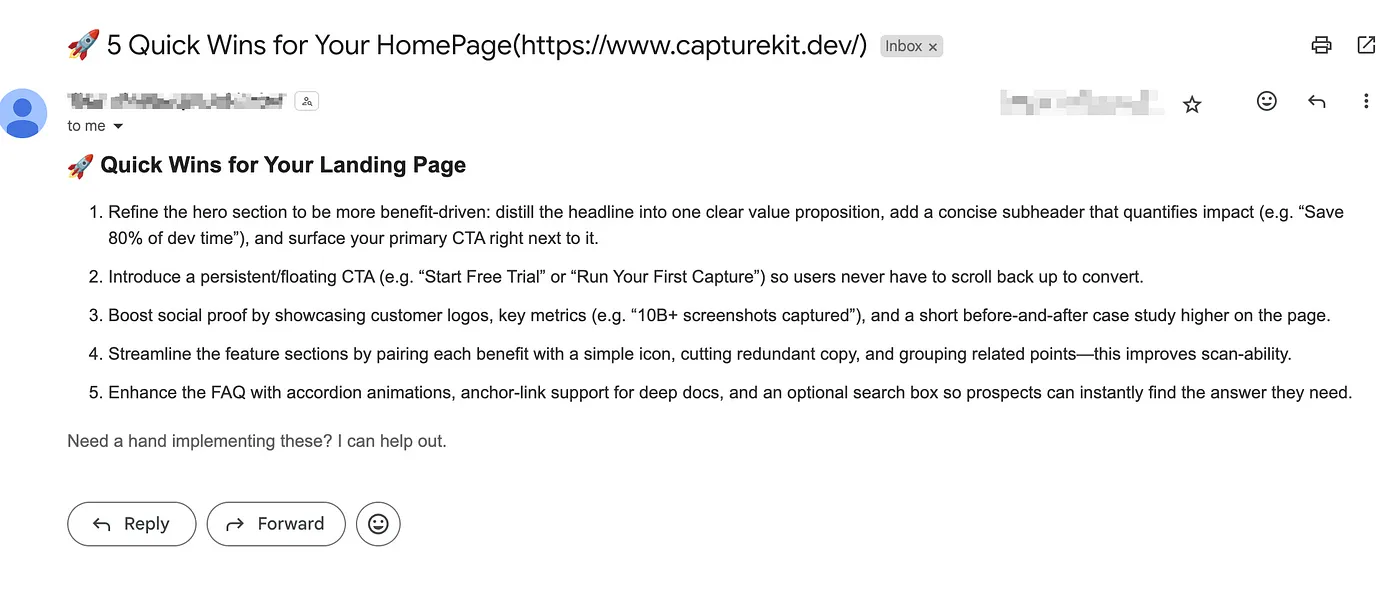
Here's how the Email Will Look Like.
And Finally, as promised here is the blueprint for this automation that you can use by importing in Make. You would need access_token from CaptureKit Account & Make credits.
Additional Automations using Screenshot API
Ready to get started with CaptureKit?
Start capturing screenshots and extracting content today. Get started for free.
Get StartedYou Might Also Like
How to Screenshot Twitch Streams At Scale
Discover automated ways to screenshot Twitch streams in real time. A complete guide for creators and data analysts to monitor and analyze live content efficiently.
3 Best Economical Screenshotone Alternatives for Screenshot Generation
Looking for affordable alternatives to ScreenshotOne? In this blog, we’ve listed the 3 best economical tools to help you scale screenshot generation without breaking your budget.
How to Wait for Page to Load in Puppeteer
Learn essential techniques for managing page load events in Puppeteer to ensure your automation scripts run correctly.